Blind Magazine : photography at first sight
Photography at first sight
Search
Close this search box.
Photographing the city at night

How to Master Night City Photography

Night city photography is among the most complex tasks in photography. You will need to leave the comfort zone of the automatic mode and develop more advanced technical skills in order to capture the desired image. How to shoot movement in low light? What settings to choose? How to capture light trails? We will take a closer look at different ways of optimizing night city photos.
Example of night city photography

© Artem Bryzgalov on Unsplash

Night City Photography: Go with wider apertures

In difficult lighting conditions, such as at night, wider apertures will admit more light into your camera. For night city photography, set your apertures to f/1.4, f/1.8, or f/2.8, and for best results, use fixed-aperture lenses across the focal spectrum. 

For optimal night city photos, switch to the manual mode and start by selecting the widest aperture and the highest shutter speed, especially if you are photographing in an urban environment and wish to capture movement. 

Remember, however, that with a wider aperture you are getting a shallower depth of field. This is therefore not the right setting for all types of shots, as we will see in a moment.

Modify shutter speeds

When photographing the city at night, first decide what it is you want to capture. If you are looking for scenes of night life, you will need a relatively high shutter speed (min. 1/60s) so that your subjects are sharp and in focus, while at the same time having an aperture that admits a lot of light. 

If you are more interested in cityscapes, such as buildings or squares, or if you wish to capture trails of light, use long exposures (but only with a tripod). Combine it with a narrower aperture to extend your depth of field and obtain a sharper image. Choosing your subject in advance for your night city photos will help you to preselect the right shutter speed.

Further reading: Seizing motion

The photography of the city at night allows us to play around with the shutter speed

© Osman Rana on Unsplash

Get to grips with ISO

The light sensitivity of an imaging sensor will vary depending on the camera, ranging from 50 up to 1,640,00 ISO. The lower the sensitivity, the less your imagining sensor will be sensitive to the light reaching the lens. ISO is an indispensable setting whenever you are in the manual mode, and it works in tandem with speed and aperture. 

When you have selected the widest possible aperture (f/1.8, f/2.8, or f/1.4, depending on your lens) and a shutter speed aimed to optimize the quality of your output (1/60s), but you are still dissatisfied with the exposure, you can adjust the ISO, for example by raising it from 200 to 1600 in order to make your sensor 3x as sensitive. 

While most digital cameras easily allow you to crank up the ISO setting, it is worth remembering that the higher the sensitivity the grainier the image is going to be. Mastering ISO thus means finding the middle ground with all the other settings in order to obtain the desired output, which is very important for night city photography.

Bring a tripod

In many types of photography, such as macrophotography, a tripod is your best friend. In low light, when other settings may be difficult to control, a tripod will help you to stabilize your camera. It also comes in handy when shooting cityscapes, allowing you to use long exposures, for example. When out for night city photography, to avoid shaking the camera when releasing the shutter, use the camera’s timer.

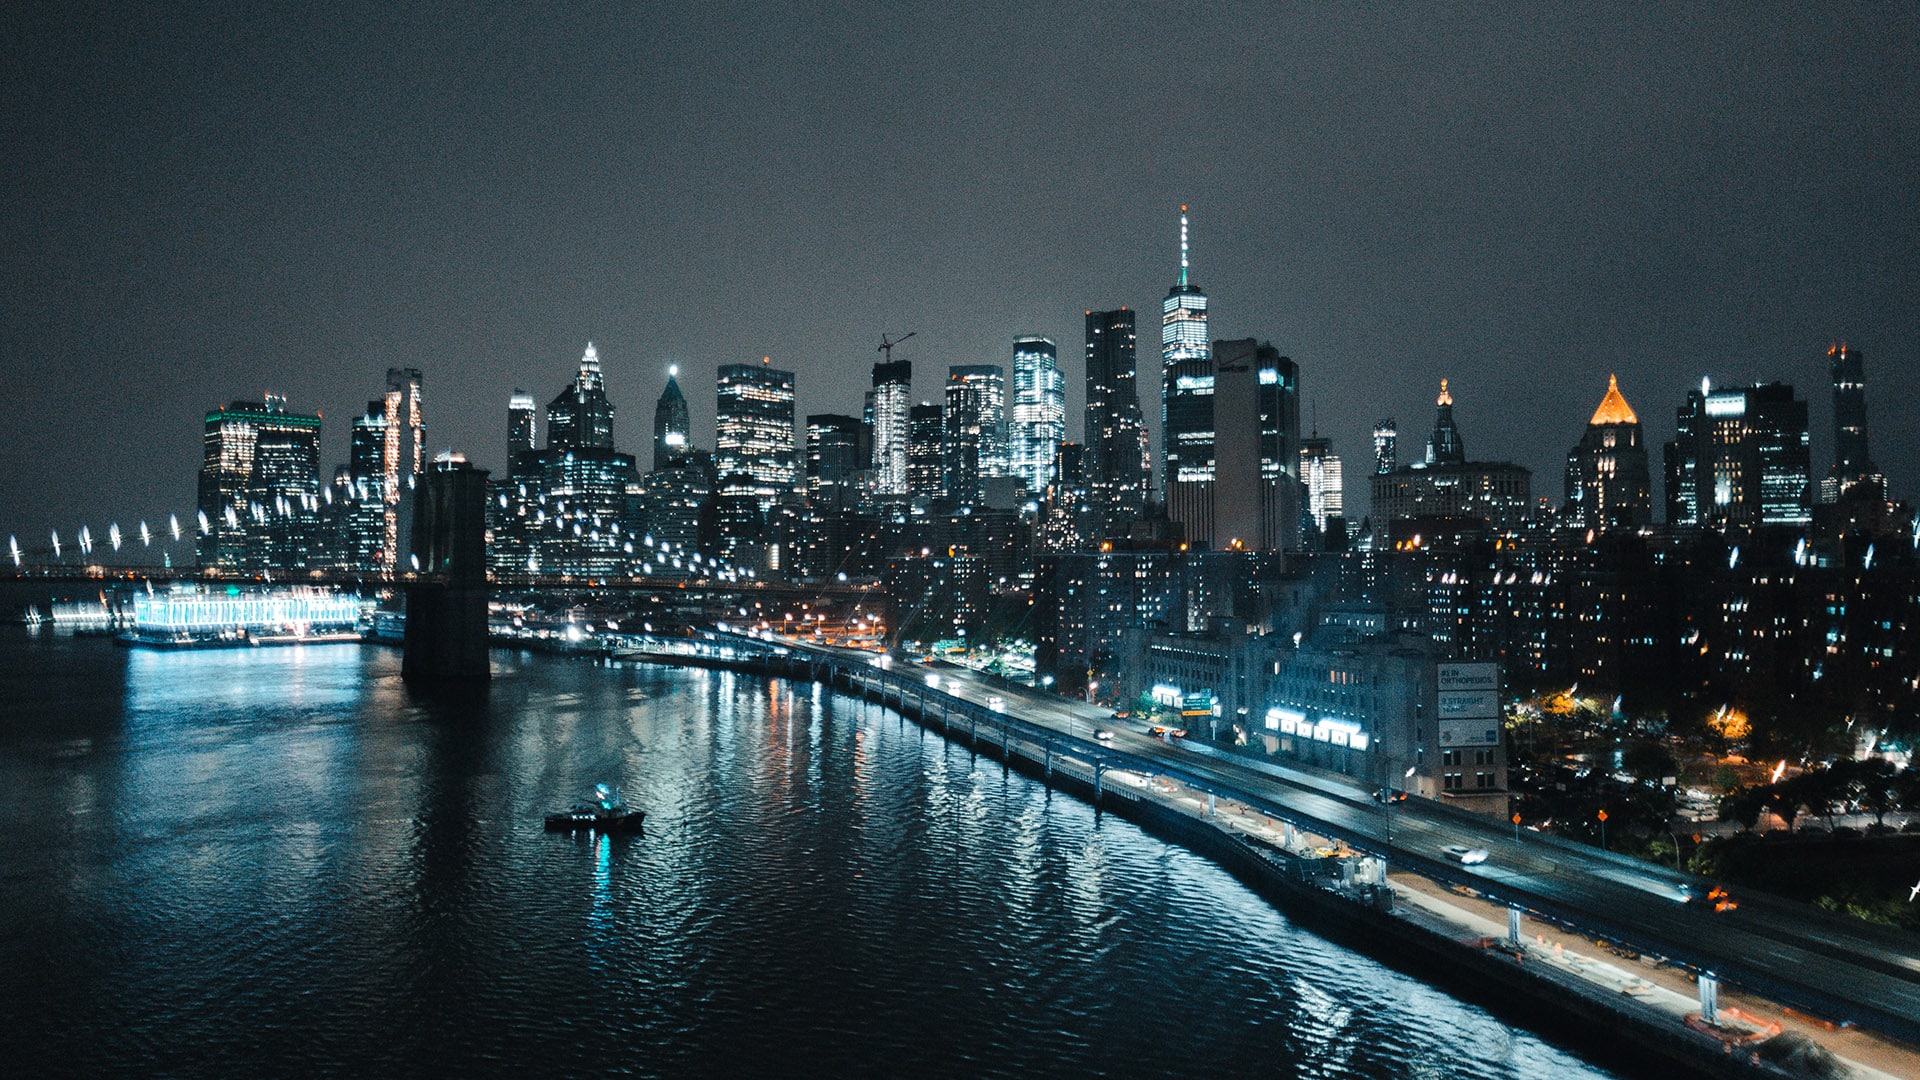
Example of a night city photo

© Rostyslav Savchyn on Unsplash

Shoot for the blue hour

The blue hour is the time of day between daylight and nighttime, when the sky is of nearly uniformly darker blue than during daytime. This interval is a photographer’s asset because it’s not yet dark enough to have to max out your settings but it is sufficiently dark to show that it’s evening. 

In addition, city lights, which are often yellow, stand out well against the blue of the sky during this transitional moment. Remember, however, the blue hour is a very narrow window, so, for night city photos, it is a good idea to think ahead and set up your equipment in advance. 

Conclusion

To photograph the city at night and obtain the desired results, leave the comfort zone of the automatic mode and manually adjust the triad: aperture, shutter speed, and sensitivity. As these settings interact, you can freely adapt them depending on whether your goal is to capture movement or to let it unfold, trying in either case to generate a correctly exposed image. 

With the help of a tripod and taking advantage of the blue hour, you are ready to begin exploring night city photography.

A city night photoshoot is a great way to capture beautiful lights

© Donny Jiang on Unsplash

By Céline Nebor

Don’t miss the latest photographic news, subscribe to Blind newsletter.